What's in this brief
- Before you start: what to line up
- Step 1: Decide what your home lab is for
- Step 2: Choose the platform that fits that purpose
- Step 3: Size the memory and storage realistically
- Step 4: Install the hypervisor and set your baseline
- Step 5: Segment the lab away from your home network
- Step 6: Build your first scenario end to end
- Step 7: Break the scenario and practice the fix
- Step 8: Add monitoring and keep a lab journal
- Step 9: Set a rebuild and retire habit
- What a first-year home lab actually costs
- Where the hours go in a first home lab
- The safety and security rules that are not optional
- Cloud free tiers versus hardware on your desk
- A worked example: a security lab built over eight weeks
- How a lab turns into evidence an employer can check
- Common mistakes when building a home lab
- Troubleshooting: what if the lab will not cooperate
- The home lab checklist
- The bottom line
Read enough certification advice and you will hit the same sentence over and over: employers want hands-on experience, so get hands-on experience. It is true, and on its own it is useless, because the people who most need that experience are precisely the ones who cannot get it at work. If you are studying for a first credential while working outside IT, or sitting in a support seat that never touches servers, nobody is going to hand you a domain to break. A home lab is the standard answer to that problem, and it has been for decades, but the advice usually stops at the word “lab” and leaves you to guess at the rest.
This walkthrough gives you the rest. It runs nine steps, starting with the one that actually saves money (deciding what the lab is FOR before you buy anything), then choosing a platform with the trade-offs stated honestly, sizing memory and storage so your machines actually run, installing a hypervisor, segmenting the lab away from your household network, building a first scenario end to end, breaking it on purpose, adding monitoring and a written record, and finally setting a habit that keeps the lab useful instead of letting it become a shelf ornament. It sits alongside our walkthrough on getting an IT certification and our process for studying for a certification exam. Keep the companion on this page open and enter your inputs once as you read.
Key takeaways
- Decide the purpose before the hardware. A networking lab, a security lab, and a cloud lab want different machines, and buying first is how people end up with equipment that does not suit the thing they were studying for.
- Memory is the binding constraint, not processor speed. Reserve an illustrative 2 GB for the hypervisor, then budget roughly 2 GB per lightweight machine, 4 GB per general server or client, and 6 GB per security analysis machine.
- Cheap hardware is not always cheap. A used enterprise server can land near an illustrative $510 for its first year once idle power is counted, against roughly $444 for a quiet mini computer and $235 for a desktop you already own.
- Isolate the lab from the household network before you build anything on it, and never expose a lab service to the internet without deliberate hardening you can explain.
- A lab that produces no record produces no evidence. Monitoring and a short written journal are what turn practice into something you can show an interviewer.
Before you start: what to line up
A home lab is less a purchase than a sequence of decisions, and the ones that matter most cost nothing. Spend an evening on them before you spend anything else, because the expensive mistakes in this project are almost all made in the first week, by people who bought equipment before they knew what they were going to do with it.
Have these in front of you before you start:
- The credential or skill you are actually working toward. The exam objectives, or the job posting you are aiming at, are your specification. A lab built without one is a pile of machines with nothing to prove.
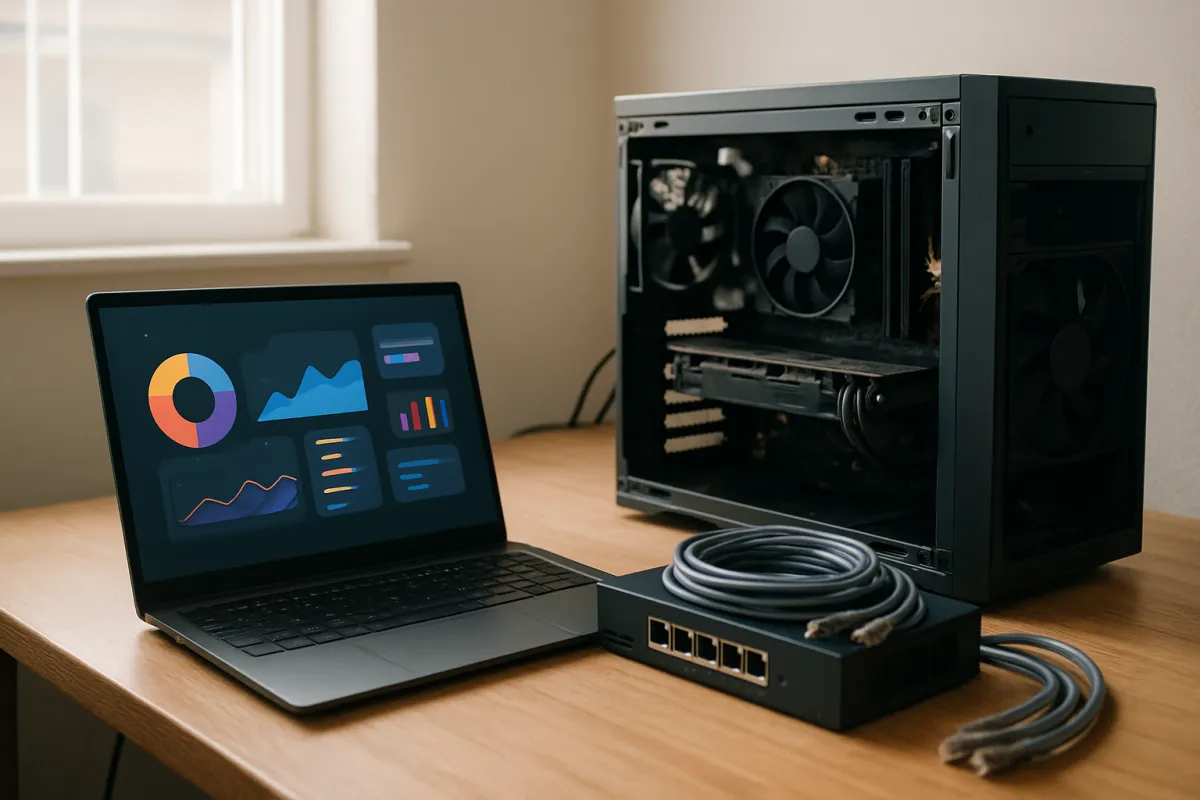
- An honest inventory of what you already own. An older desktop, a laptop with upgradable memory, a spare drive, a router with more capability than you have used. Most first labs can start on existing hardware, and starting there is not a compromise, it is the correct sequencing.
- Somewhere the lab can physically live. Noise and heat are real constraints. A machine that has to sit in a bedroom rules out a class of hardware entirely, and finding that out after delivery is expensive.
- A weekly hours budget you will actually keep. Building a first scenario end to end is an illustrative 30 to 45 hours of work depending on the lab type, so your weekly hours set the calendar more than anything else does.
- A rough cost ceiling, including running cost. Electricity is a recurring cost that people consistently forget, and on some hardware it exceeds the purchase price within two years.
Time estimate: plan an illustrative one evening for the decisions, one weekend for the platform and hypervisor, and 30 to 45 hours spread over six to ten weeks to reach a first working scenario. Difficulty: moderate, and the hard part is finishing a scenario rather than starting one. Enter your target lab type, platform, memory budget, weekly hours, and electricity rate in the companion on this page, and it will read back how many machines your memory supports, an illustrative first-year cost, and a realistic calendar. Then work the nine steps in order.
Step 1: Decide what your home lab is for
Start with the purpose, because a lab is not a general-purpose object and the people who treat it as one waste the most money. A networking lab, a security lab, a cloud and containers lab, and a general Windows server lab want different things from the hardware, the network, and your time. Building the wrong one is not a small error you can adjust later; it is often a machine that cannot do the thing you actually needed, sitting next to a study plan it does not serve.
Write down the credential or the job you are working toward, then read its objectives and ask what a person would need to physically do in order to demonstrate each one. A networking track wants multiple routed segments, address planning, and traffic you can capture and read, which favors many small machines and network devices over raw memory. A security track wants a machine you can deliberately misconfigure, a machine to attack it from, a place for logs to land, and analysis tooling, which is memory-hungry and needs strict isolation. A cloud track often wants an account with a free tier far more than it wants hardware on your desk. A general server track wants a directory service, one or two member servers, and a client, which is the classic small domain build.
The illustrative arithmetic follows directly from that choice. On our planning figures, a networking lab averages about 2 GB per machine and needs at least four of them running together, a security lab averages about 6 GB per machine and needs at least four, and a cloud or general server lab averages about 4 GB per machine and needs three to four. Those two numbers, the per-machine appetite and the minimum count, decide your memory budget before you look at a single product. Watch out for the version of this step where you decide the lab is “for everything”, because that reliably produces a purchase sized for none of it. Pick one purpose now, and add a second lab type later once the first one has produced something.
Step 2: Choose the platform that fits that purpose
With a purpose written down, choose the platform, and choose it on the trade-offs rather than on enthusiasm. There are five routes people realistically take, and each one is genuinely the right answer for someone.
- A desktop or laptop you already own. The cheapest possible start, since virtualization support is standard on machines from the last decade or so. Limits are memory ceilings, especially on thin laptops where the memory is not upgradable, and sharing the machine with your daily work.
- A small low-power mini computer. Quiet, compact, low idle draw, and often able to take a generous amount of memory. It is the route that fits a shared living space, and the one most likely to still be running a year later.
- A used enterprise server. Enormous memory capacity and expandability for the money, and the closest match to workplace equipment. It is also loud, power-hungry at idle, and physically demanding to house.
- A small cluster of single-board computers. Excellent for learning clustering, orchestration, and physical networking, and almost silent at a tiny power draw. Each individual node is weak, so it is a poor fit for memory-heavy machines.
- A cloud free tier. No hardware, no noise, no power bill, and the only route that teaches the real cloud environment. It is metered, which changes how you experiment, and it teaches you less about the layer beneath.
Match the route to the purpose rather than to the specification sheet. A security lab needs memory, so a mini computer with generous memory or a used server suits it, and a cluster of small boards does not. A networking lab benefits from several physical network ports and multiple machines, which suits the cluster route or a server with several interfaces. A cloud track should probably start in the cloud. Watch out for the trap of buying enterprise gear because it looks impressive: the honest question is whether you have a room where noise does not matter, and if the answer is no, that hardware will end up unplugged.
Step 3: Size the memory and storage realistically
Memory is the constraint that stops people, and it stops them earlier than they expect. A lab does not fail because the processor is slow, it fails because you try to start the fifth machine and there is no memory left to give it, so you shut things down, run scenarios in fragments, and eventually stop bothering. Size for the number of machines you need running at the same time, because that is the only figure that matters.
The illustrative arithmetic is simple. Reserve about 2 GB for the hypervisor itself, then divide what remains by the per-machine budget for your lab type: about 2 GB for a lightweight network appliance or small Linux machine, about 4 GB for a general-purpose server or a desktop client, and about 6 GB for a security lab machine running analysis tooling. On a 16 GB host that leaves 14 GB, which is seven lightweight machines, three general servers, or two security machines. On a 32 GB host it leaves 30 GB, which is fifteen, seven, or five. Run your own memory figure through the companion and it will do this division for you and tell you whether the result clears the minimum for the lab type you picked.
Storage matters less but fails more annoyingly. Virtual machines are sensitive to how quickly storage responds rather than how much of it there is, so a solid-state drive of modest size generally beats a large mechanical drive for a lab, and running several machines from one slow disk is a common cause of a lab that feels broken when it is merely starved. As an illustrative planning figure, allow around 40 to 60 GB per general-purpose machine once you account for snapshots, which are the feature you will use constantly and the one that quietly consumes space. Watch out for filling the drive with snapshots you never delete, since a lab host that runs out of storage mid-scenario can corrupt the machines you were working on.
Step 4: Install the hypervisor and set your baseline
With hardware chosen, install the layer that lets one machine pretend to be several. Broadly there are two families: a bare-metal hypervisor that installs directly onto the hardware and runs nothing else, and a desktop hypervisor that installs as an application on top of your existing operating system. The bare-metal route gives you more of the host’s resources and behaves more like the equipment you will meet at work. The desktop route lets you keep using the machine normally and is the right start if the lab host is also your daily computer.
Do the boring preparation first, because skipping it is the most common reason a first install fails. Confirm that hardware virtualization support is enabled in the firmware settings, since it is frequently switched off by default and its absence produces confusing errors rather than a clear message. Back up anything on the drive you are about to install to, because a bare-metal hypervisor install will take the whole disk. Have a second machine available to reach the lab host’s management interface from, since a bare-metal hypervisor typically has no desktop of its own and you will administer it over the network.
Then set a baseline you can return to. Create one clean template machine per operating system family you will use, patch it fully, install whatever tools you always want present, and then leave it alone as a master copy you clone from rather than a machine you use. That single habit saves hours across the life of the lab, because every future scenario starts from a known-good machine in minutes instead of a fresh installation in an hour. Take a snapshot of each template once it is clean. Watch out for the opposite pattern, where every machine is built by hand from scratch and no two are alike, because it makes failures impossible to attribute: when something breaks, you cannot tell whether it was the scenario or the machine.
Step 5: Segment the lab away from your home network
Before you build anything interesting, decide what your lab machines are allowed to talk to, because the default answer is “everything in your house” and that is the wrong answer. Lab machines are deliberately unpatched, deliberately misconfigured, and in a security lab deliberately vulnerable. On a flat home network, they sit alongside your personal computer, your phone, your files, and every connected appliance you own, with nothing between them.
The mechanism is segmentation. Inside the hypervisor, create a virtual network that lab machines attach to instead of attaching them directly to your household network. Give that network its own address range, distinct from the one your home router hands out, so you can tell at a glance which world an address belongs to. Then put something between the two: a small firewall or router machine with one interface on the lab network and one on the household network, configured to allow only what you deliberately choose. In practice a good starting rule set is that lab machines may reach the internet for updates, may reach each other freely, and may not initiate connections into the household network at all.
If your lab spans multiple physical machines, the same principle moves up a level and is where a managed switch earns its keep, since it lets you keep lab traffic on its own tagged network across the wire rather than mixing it with household traffic. The illustrative test for whether you have done this correctly: pick a lab machine, and try to reach your own personal computer from it. If you can, the segmentation is not finished. Watch out for the convenience shortcut of putting one lab machine on the household network “just for a minute”, because that minute is how the isolation dissolves. Build the boundary first, while the lab is empty and mistakes are free.
Step 6: Build your first scenario end to end
A collection of running machines is not a lab, it is a collection of running machines. What produces learning, and what produces evidence, is a scenario: a small environment that does something, built end to end, that you can operate and then deliberately damage. Your first one should be modest and complete rather than ambitious and half-built, because the value comes from finishing it.
The classic first scenario, and still the best one for a general server or certification track, is a tiny domain. Build a directory service on one machine so it holds accounts and provides name resolution for the lab. Add a second machine as a member server that provides one service you can point at, such as file storage or an internal web page. Add a client machine that joins the domain and logs in with an account you created. That is three machines plus your firewall machine, which on our illustrative figures is 4 GB each for the servers and client, comfortably inside a 16 GB host. A networking track builds the equivalent with routed segments and a client on each; a security track builds a target machine, an analysis machine, and a place for logs to land.
Then use it like it is real. Create a user, put them in a group, give the group access to a share, and log in as them to confirm they can reach it. Add a second user who should not have access and confirm they cannot. These small end-to-end checks are exactly the tasks that performance-based exam questions ask about, and they are also the tasks a first job actually contains. Allow an illustrative 30 hours for a networking scenario, 35 for a general server or cloud scenario, and 45 for a security scenario, spread across whatever weekly hours you can keep. Watch out for stopping at “the machines are installed”, which feels like progress and teaches almost nothing, because nothing is connected to anything yet.

Step 7: Break the scenario and practice the fix
Building something that works teaches you the happy path. Almost all of the actual job, and a disproportionate share of what interviews probe, is what happens when the happy path stops working. So once your scenario runs, break it on purpose, and practice diagnosing it as though someone else did it and you have no idea what changed.
Do it deliberately and in isolation, one fault at a time, so the diagnosis has a clean answer. Point a client at a name server that does not exist and watch what fails and in what order. Change a firewall rule so a service becomes unreachable and trace where the traffic stops. Let an account expire, or remove a group membership, and see what error the user actually sees, which is rarely the error the documentation implies. Fill a disk. Change a machine’s address so it no longer matches its records. Each of these is a small, safe, reversible fault that produces a real troubleshooting exercise.
The discipline that makes this valuable is writing the fault down before you fix it and then working the diagnosis in a fixed order: what is the symptom exactly, what layer is it at, what changed most recently, and what does the evidence say rather than what do I assume. Snapshots are what make this safe, because you can take one before you break anything and return to a known-good state in seconds if you go too far. As an illustrative habit, aim for one deliberate fault per lab session once the scenario is stable. Watch out for breaking three things at once, which produces confusion rather than diagnosis, and for fixing something by rebuilding it before you understood why it failed, which converts a learning opportunity into an hour of reinstallation.
Step 8: Add monitoring and keep a lab journal
A lab that leaves no trace behind is a lab you cannot prove you ran. Two things fix that, and both are cheap: somewhere for logs and metrics to land, and a written record of what you did. They are also the two things that convert a hobby into evidence, which for a certification candidate without work experience is the entire point.
On the monitoring side, add a machine whose job is to collect. Point the logs from your other machines at it so you have a central place to look when something breaks, and add basic metrics collection so you can see resource use over time. This is genuinely useful for troubleshooting, since central logs are how you catch a failure that happened while you were asleep, and it is also directly relevant experience: log collection and monitoring appear in security, systems, and cloud roles alike. A monitoring machine is one of the memory-hungrier machines in a lab, which is worth accounting for when you size the host.
On the journal side, keep it short and keep it current. For each session, note the date, what you set out to do, what you actually did, what broke, and how you diagnosed it. A few lines is enough, and it takes five minutes at the end of a session while it is fresh, which is dramatically easier than reconstructing it in an interview six months later. Add a simple network diagram and keep it updated, because drawing your own environment is one of the fastest ways to notice that you do not fully understand it. Watch out for the perfectionist version of this, where you plan an elaborate documentation system and therefore write nothing; a plain text file that exists beats a polished wiki that does not.
Step 9: Set a rebuild and retire habit
The failure mode of a successful lab is not that it breaks, it is that it calcifies. The scenario works, so you stop touching it, and six months later you have a set of machines running quietly that teach you nothing, consume power, and slowly drift out of date. A lab has to be rebuilt to stay useful, and that needs to be a habit rather than a good intention.
Set a rhythm. When a scenario has taught you what it was going to teach you, write the closing note in your journal, take a final snapshot if you want the option to return, and tear it down. Rebuilding the same scenario from scratch a second time is not wasted effort, because the second build is where you find out how much you actually retained, and it is usually much faster and much more revealing than the first. Then build the next scenario one step more ambitious than the last, which produces a visible trajectory rather than a plateau.
Retire hardware on the same principle. If a machine has been powered on for months without being used, turn it off, because idle power draw is a real recurring cost and an unused machine is not a lab, it is a heater. Our illustrative figures put a used enterprise server near $210 a year in idle electricity at fifteen cents per kilowatt hour, against roughly $24 for a small low-power machine, so leaving the wrong hardware running is a decision with a price attached. Watch out for the museum pattern, where the lab exists mostly to be photographed, and for the opposite, where you tear down a scenario before you have written down what you learned from it.
What a first-year home lab actually costs
The purchase price is the part people compare and the part that misleads them, because a lab has a running cost and on some hardware that running cost is larger than the purchase within two or three years. The figures below are illustrative planning numbers built from a stated method rather than quotes: each route’s hardware cost plus one year of electricity, calculated as the idle draw in watts multiplied by 8,760 hours, divided by 1,000, at an assumed fifteen cents per kilowatt hour. Your own electricity rate, your local used-hardware market, and how many hours a day the lab actually runs will all move these.
Illustrative first-year cost by home lab platform
Hardware plus one year of idle electricity at an assumed fifteen cents per kilowatt hour. Illustrative planning figures, not quotes.
Illustrative first-year totals for planning only. Hardware components are an assumed $300 for a used server, $420 for a mini computer, $260 for three single-board computers, $150 to upgrade a desktop you already own, and nothing for the cloud route, whose $120 is a year of paid hours beyond a free allowance. Power is the idle draw run continuously for a year; a lab that only runs while you use it costs far less to run.
Two things stand out from that arithmetic. The used server, which usually looks like the bargain, ends up the most expensive first year here because 160 watts running continuously is roughly $210 of electricity, seventy percent of what the hardware itself cost. And the desktop you already own, which people dismiss as not a real lab, is the cheapest local route by a wide margin precisely because the hardware line is only the upgrade. Enter your own electricity rate and platform in the companion to see how the ordering changes; a low local rate flatters the server, and a high one punishes it hard.
Where the hours go in a first home lab
Money is the smaller cost. Time is the one that decides whether the lab gets finished, and it is distributed differently from how beginners expect. Most people assume the hardware and the hypervisor are the project; in practice they are a weekend, and the scenario work that follows is the bulk of it. Budgeting your hours the way the work actually falls is what stops the lab stalling at the halfway point where the machines exist and nothing has been built with them.
Illustrative split of time in building a first home lab
Rough share of total hours by activity, for the first scenario. Shares sum to 100 percent and shift with your lab type.
Illustrative proportions, not a measurement. A networking lab shifts more time into the networking slice; a security lab shifts it toward scenarios and monitoring; a cloud lab shrinks the setup slice almost to nothing and grows the planning slice, because cost control becomes part of the design.
The practical read is that if you have spent most of your lab hours on hardware and installation, you have not started the part that teaches you anything yet. The companion turns your weekly hours into a realistic calendar for a first scenario, which is usually the number that surprises people most.
The safety and security rules that are not optional
A home lab is a place to make mistakes, which is exactly why the boundary around it has to be solid. These are not best practices to adopt when you have time; they are the conditions under which the lab is safe to run at all.
- Never expose a lab service to the internet without deliberate hardening you can explain. Forwarding a port from your router to a lab machine puts a deliberately weak system in front of the entire internet, on your home connection, under your name. If you want remote access to your lab, use an encrypted tunnel into it rather than publishing services, and understand what you have opened before you open it.
- Isolate the lab from the household network. Separate address range, separate virtual network, a controlled boundary between the two, and a test that confirms a lab machine cannot reach your personal computer. This protects your family's devices from your experiments and your experiments from a household device you forgot about.
- Treat deliberately vulnerable machines as radioactive. If a scenario involves intentionally weak systems or hostile samples, that environment gets its own isolated network with no route out, and it gets destroyed rather than reused. Snapshot before, destroy after.
- Only test what you own. A lab is your equipment on your network. Pointing tools at anything else, including systems belonging to an employer, a school, or a service you use, is a different activity with legal consequences, and the rules vary by jurisdiction.
- Respect the electrical and physical side of used enterprise gear. Higher continuous draw means checking what else is on the circuit, and older equipment can be genuinely loud and hot enough to matter in a living space. Ventilation, dust, and a plan for the noise are part of the decision, not afterthoughts.
- Keep lab credentials out of your real life. Lab passwords are throwaway by design, so never reuse a password that appears anywhere real, and never sign into personal accounts from a lab machine.
None of that makes a lab dangerous to run. It makes it a controlled environment rather than an uncontrolled one, and the difference is entirely in the boundary you build in step 5.
Cloud free tiers versus hardware on your desk
The choice between a cloud account and hardware is not a purity contest, it is a question of what you are trying to learn. Each teaches something the other cannot, and for a fair number of candidates the honest answer is both, in sequence.
A cloud free tier wins when the skill is a cloud skill. If you are working toward a cloud credential, practicing in the real environment beats practicing in a local imitation of it, because the console, the terminology, the permission model, and the failure messages are the actual ones you will be examined and interviewed on. Our review of cloud computing certifications and our walkthrough on becoming a cloud engineer both point at credentials where this is the right call. It also wins on physical constraints: no noise, no heat, no power bill, and nothing to store.
Local hardware wins when the skill is underneath the cloud. Hypervisor behavior, physical networking, cabling and switching, hardware failure and recovery, and any long-running experiment you want to leave alone for a month are all easier and cheaper on equipment you own. The meter changes how you experiment, and it should: on a cloud free tier, the honest risk is a resource left running past the free allowance, so set billing alerts on day one and make destroying resources part of finishing a session rather than something you mean to do later. Our illustrative $120 for a cloud year assumes exactly that discipline; without it the figure is unbounded, which is the whole point of the warning.
A worked example: a security lab built over eight weeks
Take a candidate studying toward a first security credential while working outside IT, with six hours a week to give it and no useful hardware beyond a laptop that cannot take more memory. Here is the whole method run end to end with illustrative numbers, so you can see how the decisions chain together.
Step 1 sets the purpose: a security lab, because the credential’s objectives are full of tasks involving logs, traffic, and misconfigured systems. That single decision fixes the memory arithmetic at about 6 GB per machine and a minimum of four machines running together, which is 26 GB before overhead. Step 2 rules out the laptop immediately, rules out a cluster of small boards (too little memory per node for analysis tooling), and comes down to a used server against a quiet mini computer. The candidate lives in a flat with one bedroom, so noise decides it: a mini computer with 32 GB of memory, an illustrative $420. Step 3 checks the arithmetic: 32 GB minus 2 GB for the hypervisor leaves 30 GB, which at 6 GB per machine is five machines, one more than the minimum. Storage is a modest solid-state drive, allowing an illustrative 50 GB per machine with snapshots.
The running cost follows. At 18 watts of idle draw running continuously, that is 18 times 8,760 divided by 1,000, or about 158 kilowatt hours, which at fifteen cents comes to roughly $24 for the year. First-year total: about $444, or roughly $89 per machine the lab can actually run. Compared against the used server route at an illustrative $510 for four to eight machines, the server is better value per machine and worse on every other axis that matters in a one-bedroom flat.
Steps 4 and 5 take the first weekend: a bare-metal hypervisor installed, two clean templates built and snapshotted, a lab-only virtual network on its own address range, and a small firewall machine between the lab and the household network, tested by confirming a lab machine cannot reach the candidate’s own laptop. Step 6 is the bulk of it: a target server, an attack machine, a client, and a log collector, with users, groups, and one service that actually works end to end. At 45 illustrative hours for a security scenario and six hours a week, that is about eight weeks, and the first four of them feel slow because nothing is connected yet.
Steps 7 through 9 are what the eight weeks buy. The candidate breaks name resolution, watches the failure cascade through the client, and traces it in the central logs. They misconfigure a firewall rule, lose access to the service, and find it by comparing against the diagram they drew in week three. Each session ends with five lines in a journal. By the end there is a credential in progress, four written scenarios with faults and fixes, a diagram, and a set of specific answers to the question every interviewer asks about hands-on experience. That is the return on $444 and roughly 48 hours, and it is a much better return than the same money spent on another practice-test subscription.

How a lab turns into evidence an employer can check
The reason to build any of this is that experience you cannot describe is experience you cannot trade. A lab converts into hiring evidence only when it produces artifacts, and artifacts are made deliberately rather than as a byproduct. Three of them do most of the work.
The first is a scenario write-up. For each scenario, one page: what you built, why, a diagram of the environment, the faults you introduced, how you diagnosed each one, and what you would do differently. This is the format a hiring manager can actually read, and it converts directly into an interview answer because it is already structured as situation, action, and result. The second is the diagram itself, kept current, because being able to draw your own environment on a whiteboard is a skill that gets tested in interviews far more often than people expect. The third is the journal, which is the raw material both of the others are built from.
Put them somewhere a stranger can reach: a repository, a simple site, or a short document you can attach. Our walkthrough on building a tech portfolio covers packaging that so a reviewer can evaluate it in a couple of minutes, and the same rules apply here, since a lab write-up nobody can find is worth about as much as one that does not exist. On the resume, one specific line beats a paragraph of generality: name the environment, the scale, the fault, and the fix.
Be honest about what it is. A home lab is not production experience, and claiming otherwise falls apart in the first technical question. What it genuinely proves is that you can build, break, diagnose, and document, unsupervised, on your own time, which is exactly the disposition an employer hiring for a first technical role is trying to detect. Our reviews of cybersecurity certifications for beginners and the route into an entry-level IT job both treat that combination, a credential plus demonstrable hands-on work, as the pairing that moves applications.

Common mistakes when building a home lab
Most first labs fail in one of a handful of predictable ways, and every one of them is avoidable if you know to look for it.
- Buying hardware before deciding the purpose. The most expensive mistake by a wide margin, because it produces equipment sized for a lab you were not building. Purpose first, then platform, then memory.
- Sizing for the processor instead of the memory. Cores are rarely what stops you. Running out of memory at the fourth machine is what stops you, and it is the failure that quietly kills the habit.
- Ignoring the running cost. A used server at an illustrative $210 a year of idle electricity outruns its own purchase price in under two years. That is fine if you chose it knowingly and a nasty surprise if you did not.
- Leaving the lab on the household network. The safety failure, and the one with consequences beyond your own inconvenience, because your experiments end up sharing a network with your family's devices.
- Stopping at "the machines are installed". A pile of running operating systems teaches nothing. The learning is entirely in connecting them into something that works and then breaking it.
- Building everything by hand every time. No templates and no snapshots means every rebuild costs an evening, and after two or three of those, the lab stops getting rebuilt.
- Keeping no record. The details that make a good interview answer fade in weeks. Five lines per session is the whole discipline, and skipping it wastes most of the value of the work.
Troubleshooting: what if the lab will not cooperate
What if the hypervisor will not install or your machines will not start? The overwhelmingly common cause is that hardware virtualization support is switched off in the firmware settings, which produces errors that rarely say so directly. Check that first, before you suspect anything more interesting. The second most common cause is a mismatch between the hypervisor and the age of the hardware, particularly with storage or network controllers on older enterprise equipment, which is one of the hidden costs of the used-server route.
What if everything runs but the lab feels unbearably slow? Look at memory before anything else, because a host that has overcommitted memory will appear to be busy while achieving nothing. If memory is fine, look at storage: several machines sharing one slow mechanical disk is the classic cause of a lab that feels broken when it is merely starved. Reducing the number of machines running at once usually diagnoses this in minutes.
What if you only have 8 GB of memory and cannot upgrade? Build in shifts rather than all at once. Run two machines at a time, snapshot, shut them down, and start the next pair, which is slower and more annoying but teaches the same material. Alternatively lean toward a networking-focused lab, whose machines are far lighter at an illustrative 2 GB each, or move the memory-hungry parts to a cloud free tier and keep the rest local.
What if you keep starting labs and never finishing them? Shrink the scenario until it is finishable in your actual weekly hours, then finish that. A three-machine domain that works end to end is worth more than an elaborate design that never boots. Our walkthrough on studying for a certification exam covers the same pattern in study planning, and the fix is the same: smaller units, actually completed.
What if you are worried about doing something illegal or unsafe? The line is clean: your equipment, your network, your data. Everything inside a properly isolated lab you own is yours to break. Anything that leaves that boundary, including scanning or testing systems belonging to anyone else, is a different activity governed by law rather than by lab rules, and the rules differ by jurisdiction, so if you are unsure, do not.
The home lab checklist
Save this and work it in order.
- Purpose. Write one sentence naming the credential or role the lab serves, and the lab type that follows from it.
- Platform. Choose the route on noise, power, space, and memory ceiling, not on the specification sheet.
- Memory. Reserve about 2 GB for the hypervisor, divide the rest by your per-machine budget, and confirm the result clears the minimum machine count for your lab type.
- Storage. Prefer a solid-state drive, allow an illustrative 40 to 60 GB per machine with snapshots, and watch free space.
- Hypervisor. Enable virtualization in firmware, install, then build and snapshot one clean template per operating system family.
- Segmentation. Lab-only virtual network, its own address range, a controlled boundary, and a test proving a lab machine cannot reach your personal computer.
- First scenario. Directory service, a member server with one real service, and a client that logs in. Finish it end to end.
- Deliberate faults. One fault per session, snapshot first, write the symptom before you fix it, diagnose in a fixed order.
- Monitoring. A collector machine with central logs and basic metrics, sized into your memory budget from the start.
- Journal and diagram. Five lines per session, a current diagram, and a one-page write-up per completed scenario.
- Rebuild and retire. Tear down finished scenarios, rebuild once from scratch to test retention, and power off hardware you are not using.
- Safety. Nothing exposed to the internet without deliberate hardening, nothing tested that you do not own, no real passwords in the lab.
The bottom line
A home lab is the most reliable answer to the advice everyone gives and nobody explains, which is to get hands-on experience when your job will not give you any. What makes it work is not the equipment; it is the order of the decisions. Decide what the lab is for, choose a platform on noise and power and memory rather than on how impressive it looks, size the memory for the machines you need running together, install a hypervisor and build clean templates, put a real boundary between the lab and your household network, then build one small scenario end to end and break it on purpose until you can diagnose it calmly.
The costs are modest and knowable: an illustrative $235 to $510 for a first year depending on the route, and 30 to 45 hours to a first working scenario. The return is a set of specific things you can describe when someone asks what you have actually done, which is the question that separates candidates who hold the same credential. Add monitoring so failures leave a trace, keep a five-line journal so the details survive, and rebuild often enough that the lab stays a workshop rather than a display case. Run your own inputs in the companion, pick a lab type you can finish, and build the small version this month rather than the perfect version never.
CredYard publishes this walkthrough to explain the general method of building a practice lab at home, not to recommend any particular hardware, hypervisor, operating system, vendor, or cloud provider, and nothing here is technical, legal, or career advice. Every cost, wattage, memory figure, hour estimate, and worked scenario above is an illustration of the arithmetic rather than a quote or a measurement, and real component prices, electricity rates, power draw, exam objectives, and employer expectations vary widely by region and change over time. Confirm the current requirements published by the certification body you are studying for, check the actual power and noise characteristics of any equipment before you buy it, and make sure you understand the rules that apply where you live before running any security testing, even on equipment you own.
Frequently asked questions
How much does it cost to build a home lab?
There is no single number, because the cost depends far more on which route you take than on any shopping list. As illustrative first-year figures that include both the hardware and a year of electricity at an assumed fifteen cents per kilowatt hour, repurposing a desktop you already own and adding memory and a solid-state drive lands near $235, a small low-power mini computer with generous memory lands near $444, a cluster of three single-board computers lands near $276, and a used enterprise server lands near $510 once its much higher idle draw is counted. A cloud free tier with modest paid hours on top can run near $120 for the year with no hardware at all. Those figures are illustrations of the shape of the decision, not quotes, and used hardware prices in particular swing enormously by region and timing, so price your own options before you commit.
How much RAM do I need for a home lab?
Memory is almost always the binding constraint on how many virtual machines you can run at once, so it is the specification worth spending on first. As an illustrative planning rule, reserve about 2 GB for the hypervisor itself, then budget roughly 2 GB per lightweight network appliance or small Linux machine, about 4 GB per general-purpose server or desktop client, and about 6 GB per machine in a security lab where you are running analysis tooling and capturing traffic. On that arithmetic a 16 GB host runs a comfortable small networking lab, a 32 GB host runs a realistic multi-machine domain or a security lab with room to spare, and 8 GB is workable only for one or two machines at a time. Processor cores and storage matter, but they rarely stop you before memory does.
Can I build a home lab on a laptop?
Yes, and for many certification candidates a laptop with enough memory is the most sensible starting point, because it costs nothing extra, makes no noise, and draws very little power. The practical limits are memory, which is often soldered and not upgradable on thin machines, sustained cooling, since a laptop throttles under long workloads in a way a desktop does not, and the awkwardness of using the same machine as both your lab host and your daily computer. A workable pattern is to run a desktop-style hypervisor on the laptop for two or three machines at a time, learn the fundamentals there, and only buy dedicated hardware once you can name the specific limit you have hit. Starting on what you already own also protects you from the most common mistake, which is buying equipment before you know what the lab is for.
Is a used enterprise server a good idea for a home lab?
Used enterprise gear can be excellent value for memory capacity and expandability, and it is genuinely the closest thing to the equipment you will meet at work, but it carries three costs that catch people out. It is loud, often loud enough that it cannot live in a bedroom or a shared living space, it draws substantially more power at idle than consumer hardware, which shows up as a recurring electricity bill rather than a one-time purchase, and older enterprise hardware may no longer receive firmware updates. Our illustrative first-year comparison puts a used server near $510 once a year of idle power is counted, against roughly $444 for a quiet mini computer, so the sticker price is not the whole story. If you have a basement or a garage with ventilation and a plan for the noise, it can be a strong choice; if you do not, quieter hardware usually wins.
Do I need a home lab to pass a certification exam?
You rarely need one to pass the exam itself, but for many technical certifications a lab is the difference between recognizing an answer and being able to do the task, and the second one is what the job interview tests. Multiple-choice questions can often be passed with study materials and practice tests alone, and our walkthrough on studying for a certification exam covers that side of the preparation. Performance-based questions, simulations, and the interview that follows the credential all reward hands-on repetition that reading cannot produce. The honest framing is that a lab is optional for the score and close to essential for the confidence and the evidence, which is why candidates who build one tend to interview better even when their exam results look identical on paper.
Is it safe to run a home lab on my home network?
Running lab machines on the same flat network as your household devices is the single riskiest thing beginners do, and it is entirely avoidable. Lab machines are frequently deliberately misconfigured, deliberately unpatched, or deliberately vulnerable, and anything on the same network segment can potentially reach them and be reached by them, which puts family devices, personal files, and network-connected appliances in scope. The safe pattern is isolation: put lab machines on their own virtual network inside the hypervisor, use a separate address range, control what is allowed to cross between the lab and the household network, and never forward ports from the internet to a lab service without deliberate hardening you understand. If you cannot explain exactly what can reach a lab machine, treat that as a stop sign rather than a detail to sort out later.
Should I use a cloud free tier instead of buying hardware?
A cloud free tier is an excellent choice when the skills you are practicing are cloud skills, because you are then learning the actual environment rather than a local imitation of it, and our review of cloud computing certifications covers which credentials that suits. It is a weaker choice for the things a local lab does best: physical networking, hypervisor internals, hardware failure and recovery, and any experiment you want to run for weeks without watching a meter. The genuine risk is the surprise bill, since free tiers cover a limited allowance and it is easy to leave a resource running past it, so set billing alerts and a hard habit of destroying resources when you finish. Many people end up with both, using local hardware for the fundamentals and a cloud account for the cloud-specific practice.
How do I put a home lab on my resume or talk about it in an interview?
Describe it as work rather than as a hobby: name the scenario you built, the problem you deliberately created, how you diagnosed it, and what you changed to fix it, because that narrative is what a hiring manager is actually testing for. A line that says you built a lab proves very little, while a line that says you built a small directory environment with a server and two clients, broke name resolution on purpose, and used the logs to trace the failure proves a process. Keep a short written record as you go, since the details fade quickly and reconstructing them months later is much harder than noting them at the time. Our walkthrough on building a tech portfolio covers how to package that record so a stranger can evaluate it in a couple of minutes.